Welcome to day 9 of my Blogoversary Celebration...
Today is an extra special day, it's my youngest daughter's 3rd Birthday!
Happy Birthday Little Princess...
I'd like to introduce you to Tonya from The Crafty Mummy, who is sharing a Christmas tutorial with us today.
She is also one of my lovely blogoversary Sponsors. I love making new friends, it's especially nice when their so close to home.
She is also one of my lovely blogoversary Sponsors. I love making new friends, it's especially nice when their so close to home.
Hi! I’m CraftyMummy and I dabble in lots of different crafts – patchwork, quilting, cross-stitch, scrapbooking, knitting, crochet and sewing. I blog at TheCraftyMummy.com where I share the projects I’ve done, and the projects I dream of getting to, plus some blogging and social media bits and pieces. I've been blogging for over 2 years and opened my online store on Madeit.com.au earlier this year.
I’m a stay-at-home mum to 2 gorgeous kids – yes, I’m very biased! – and I'm married to my best friend. We live in regional Queensland, Australia. Once upon a time I was a high school teacher in Brisbane and I’ve been known to teach a little piano too. But right now my number 1 job is to raise my kids and look after my home and family. I wouldn’t change that for the world!
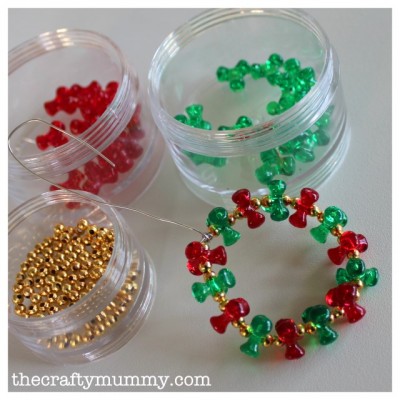
Today I'm going to share a tutorial for a cute beaded wreath. This is quick and easy, and a great craft for the kids. You could hang them on the tree, use them as a decoration on a present, or give them as gifts to teachers or friends.
What you'll need:
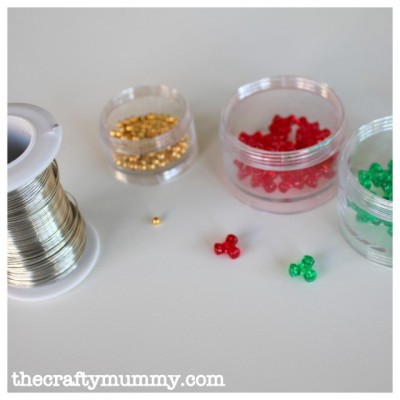
- beading wire - about 25cm - I used 24 gauge but slightly heavier would work too
- assorted beads - I used 7 red & 7 green plastic tri-beads plus 28 little gold round beads
What to do:
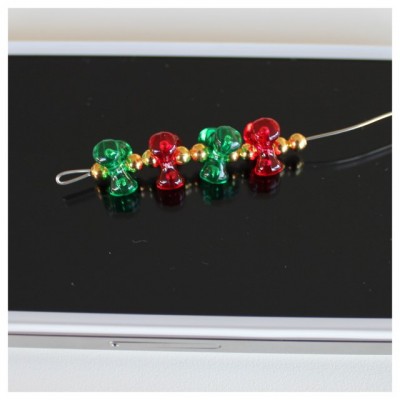
- Cut your wire to about 25cm and band a little hook in one end (so those beads don't fall off!)
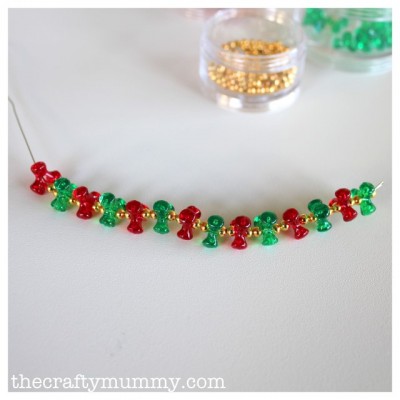
- Start threading on your beads. I alternated red and green beads with two gold beads in between them, but you could choose any colours.
- Once your beads are threaded, twist the wire into a circle. (Make sure you're happy with the size. Add more beads if you want to.)
- Slip the long end of the wire through the little loop and make sure the circle of beads is tight. Twist the wire a couple of times to secure it.
- Make the long end into a loop to hang.
- You could add a ribbon bow or make the wire short and tie on a ribbon to hang your decoration if preferred.
All done! I also made beaded angels and beaded stars last Christmas so pop over to my blog to see them too.
Thanks for having me, Rochelle.


Thanks for having me, Rochelle!
ReplyDeleteHappy BIrthday to your Little Princess! 3 is such a cute age!
These are really cute! ♥
ReplyDeleteI love the beaded ornaments, unfortunately I cannot find the beads anywhere. Can anyone suggest where to get them?
ReplyDeleteHi, here is a website that Tonya (CraftyMummy) has linked to in the post
Deletehttp://www.pollysbeads.com.au/Beads/Plastic%20Craft%20Beads/Tri%20Beads/Tri%20beads.htm
Hope this helps! If you reside in Australia you could try craft store's like Spotlight or Lincraft or even a specialty beading shop.
Have a lovely week!
Rochelle